
Raised-bed gardening offers the perfect entry point for beginners looking to grow their own food and flowers. With better soil control, improved drainage, fewer weeds, and higher yields in smaller spaces, raised beds eliminate many common frustrations new gardeners face. Whether you have limited space, poor native soil, or physical limitations, these elevated growing areas provide an accessible solution for beginner raised bed gardening enthusiasts.
By following these five essential tips, you’ll be well on your way to creating a thriving garden that produces abundant harvests with less maintenance than traditional ground-level plots.

Choosing the right location and dimensions for your beginner raised bed gardening project lays the foundation for success. Most vegetables need abundant sunlight, good drainage, and easy access for maintenance.
Position your garden bed in a spot that receives at least 6-8 hours of direct sunlight daily. Leafy greens can tolerate partial shade, but fruiting plants like tomatoes and peppers need full sun exposure to produce well. Select level ground or a gentle slope with good drainage to prevent waterlogging during heavy rains. Avoid low-lying areas where water collects, as constantly soggy soil promotes root rot and fungal diseases.
Keep your garden easily accessible by placing it near a water source and away from large trees whose roots might invade your bed and whose canopies could block precious sunlight. If possible, orient rectangular beds north-to-south to ensure plants receive even light distribution throughout the day.
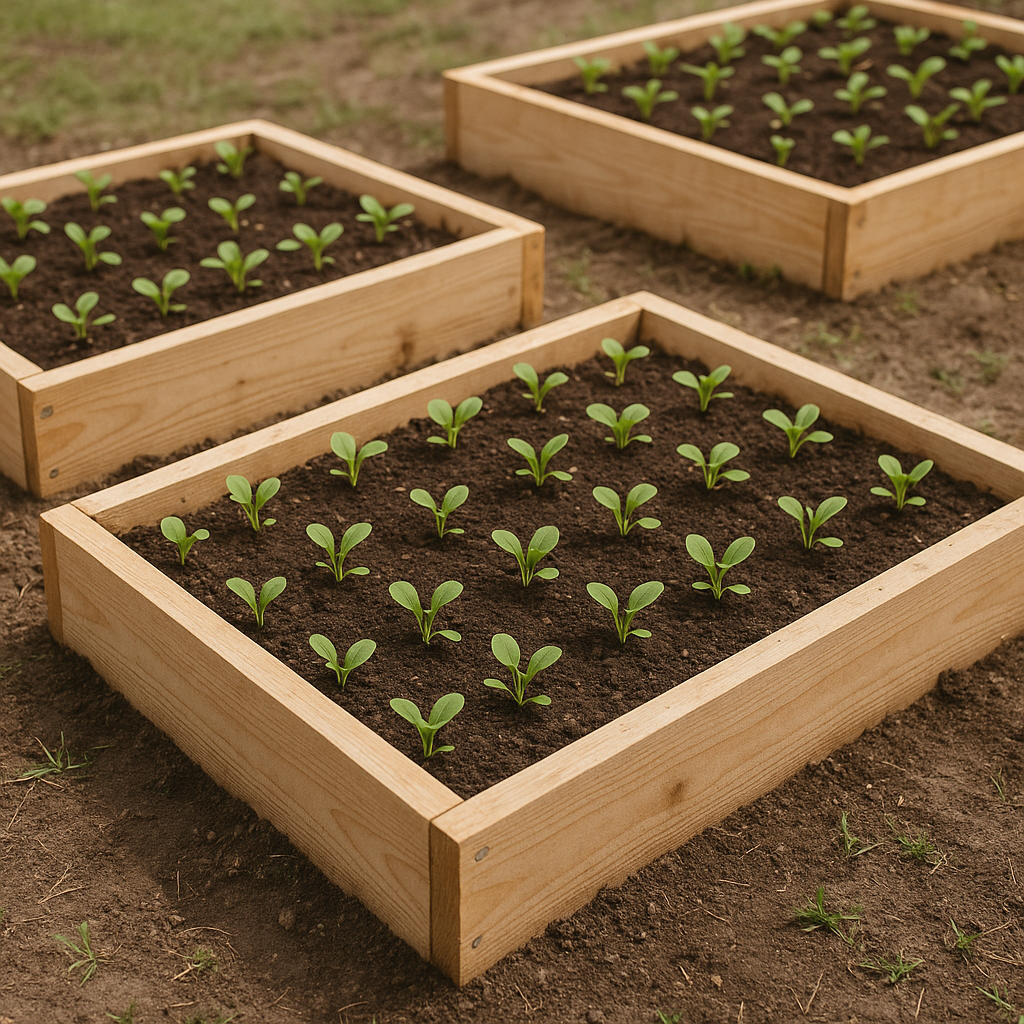
For beginners, start with manageable dimensions that allow easy access to all plants without stepping into the bed. The ideal width is 3-4 feet, ensuring you can reach the center from either side without straining. Length can vary based on your available space, but 4-foot and 8-foot lengths work well with standard lumber dimensions, minimizing cuts and waste.
Height matters too – 6-12 inches works well for most plants, while 18 inches provides extra depth for root vegetables and better ergonomics for gardeners with mobility issues. Remember that taller beds require more soil to fill but offer the advantage of less bending and kneeling.

The materials you select for your garden beds impact both longevity and plant health. Making informed choices ensures your growing space remains safe and functional for years to come.
Each material offers distinct advantages and considerations for your gardening project:
For beginner garden beds, cedar provides the best balance of durability, safety, and ease of construction, though galvanized metal options have become increasingly popular for their modern look and longevity.
When creating growing spaces for edibles, safety should be your primary concern. Avoid using railroad ties or lumber treated with chromated copper arsenate (CCA), which can leach harmful chemicals into your soil. Similarly, reclaimed materials like old tires or painted wood may contain lead or other toxins that could contaminate your harvest.
If using pressure-treated lumber, install a food-grade polyethylene liner between the wood and soil to prevent chemical migration. For natural protection, raw linseed oil or beeswax can seal untreated wood without introducing harmful substances. When in doubt, choose materials explicitly labeled as food-safe for garden construction.

The true advantage of elevated growing areas lies in complete control over your soil composition. Creating the perfect growing medium ensures plants receive optimal nutrition and drainage from day one.
Follow this layered approach to create the ideal growing environment for your plants:
Avoid using soil directly from your yard, as it may contain weed seeds, pests, or imbalanced nutrients. The investment in quality soil components pays dividends through healthier plants and better harvests.
Maintaining soil health throughout the growing season ensures continuous productivity. Apply a 2-3 inch layer of organic mulch (straw, leaves, or grass clippings) to conserve moisture and gradually feed the soil as it decomposes. As heavy feeders like tomatoes and cabbage deplete nutrients, add diluted liquid fertilizer or sprinkle balanced organic fertilizer according to package directions.
Monitor soil moisture regularly, as garden beds drain faster than ground-level plots. At season’s end, incorporate additional compost and cover crops to recharge the soil for next year’s planting. This continuous improvement approach builds increasingly fertile soil with each passing season.

Thoughtful plant arrangement maximizes your growing space while preventing disease and competition issues. Strategic placement helps beginning gardeners achieve better results with less effort.
The square foot gardening method offers a structured approach perfect for beginners. Divide your bed into 1×1 foot squares using string or thin wooden slats. Each square accommodates different numbers of plants based on their mature size:
This system eliminates guesswork about spacing and makes it easy to track what’s planted where. It’s particularly helpful when implementing raised bed tips for succession planting, where new crops immediately replace harvested ones.
Maximize your garden’s productivity by thinking in three dimensions. Install trellises, cages, or stakes along the north side of your bed to support climbing plants like cucumbers, pole beans, and peas. This vertical approach prevents them from shading shorter plants while dramatically increasing your growing space.
Strategic companion planting further enhances your garden’s performance. Plant tall sun-lovers like tomatoes with shade-tolerant lettuce underneath. Surround squash with nasturtiums to deter pests, or edge beds with marigolds and herbs to repel harmful insects while attracting pollinators. These combinations create a balanced ecosystem that reduces pest problems while optimizing space utilization.

Consistent moisture and regular maintenance dramatically improve garden results. Setting up efficient systems from the beginning saves time and ensures plant health throughout the growing season.
Raised beds dry out faster than in-ground gardens, making consistent watering crucial. Several methods work well for beginner raised bed gardening:
Aim to provide approximately 1 inch of water weekly, adjusted for rainfall and temperature. Water deeply but less frequently to encourage deep root growth, which helps plants better withstand dry periods.
Establish a routine maintenance schedule to catch problems early and keep your garden thriving:
This proactive approach prevents small issues from becoming major problems. Spend just 10-15 minutes daily on garden observation and maintenance to stay connected with your plants’ needs and growth progress. This consistent attention yields healthier plants and more abundant harvests while providing the satisfaction of watching your garden develop.

With these five foundational tips, you’re well-equipped to create a thriving first garden. Remember that gardening is a journey of continuous learning and experimentation. Start with manageable expectations, celebrate small victories, and learn from inevitable challenges. By focusing on location, materials, soil quality, strategic planting, and consistent care, your beginner raised bed will quickly become a productive and rewarding space that improves with each growing season.
As your confidence grows, consider expanding with additional beds or experimenting with season extension techniques like row covers or cold frames. The skills you develop with your first garden bed provide a strong foundation for a lifetime of successful growing.
Aim for at least 6–12 inches of soil; 18 inches is ideal for root crops and extended water retention.
Use a 50/50 blend of quality topsoil and compost, plus optional 10% worm castings or coconut coir for moisture.
Yes—just ensure drainage holes, add a permeable liner, and choose a deeper bed (10–12 inches) to compensate for no below-bed soil.
Generally, 1″ of water per week; in hot weather, check soil daily and water when the top inch feels dry.
Choose raw tung or linseed oil; avoid paints or waterproof sealants on interior surfaces to prevent soil-borne off-gassing.